Create a custom view of a document library
You can create custom views of a document library to display items in a way that makes sense for you. For example, you can select the columns you want to display and arrange them in the order you want. You can also sort, filter, or group items to create a view that suits your needs. When you're done, just give the view a name and save it. A link to the custom view will appear in the view menu at the top right corner of the document library page where you created the view.
Use one or more of the below methods to create a custom view of a document library. When done, you can give the view a name and save it. A link to the saved view will appear on the view menu of the library where you created the custom view.
Choose which columns to display in a document library
 to view in a document library" />
- Go to the document library where you want to create a custom view.
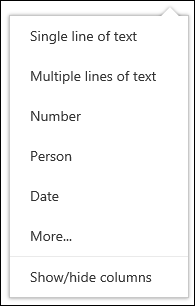
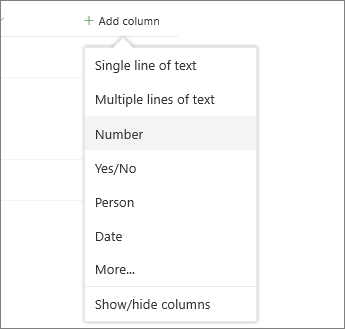
- On the document library page, click + or + Add column.
- To create and add a new column type to include in your custom view, select the column type you want to add, give it a name and any other data needed, and click Save. If you have library owner or admin permissions for the library where you want to create and add a new column type, click More. to go to the library settings page where you can create and add other types of columns. For more information about creating and adding other types of columns, see Create a view.
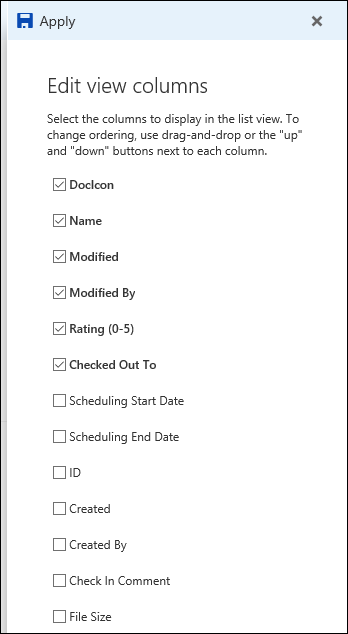
To choose which columns you want to appear, click Show/hide columns, select the columns to show or hide, and then click Apply.
Note: Does your screen look different than this? Your administrator may have classic mode set on the document library. If so, see Create a view.
Arrange the columns in a document library
to view in a document library" />
- On the heading bar of the document library page, click + or + Add column.
- Click Show/hide columns at the bottom of the list.
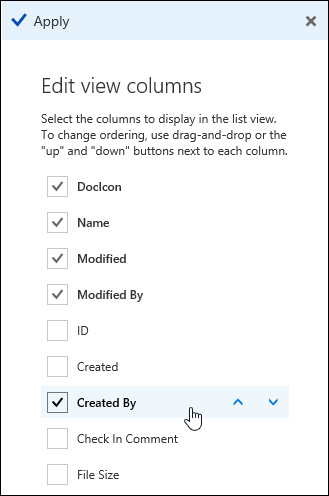
In the Edit view columns pane, select a column from the list and either drag and drop or use the up or down arrows to change the order in which the columns will appear.
Note: Does your screen look different than this? Your administrator may have classic mode set on the document library. If so, see Create a view.
Sort items in a document library
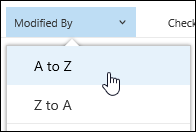
- On the document library page, point to the name of the column that you want to sort by and click the down arrow next to the column name.
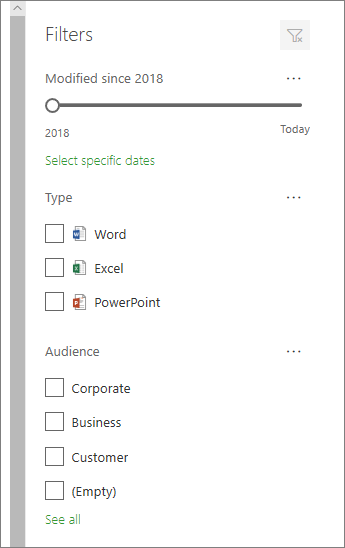
Filter items in a document library
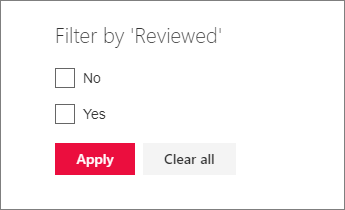
- On the document library page, point to the name of the column that you want to filter by and click the down arrow next to the column name.
- Click Filter by and then select the value that you want to use to filter the items in Filter by panel. Only items that match the value you've chosen will then show up in the list.

You can also click Open the filter pane
.
Group items in a document library
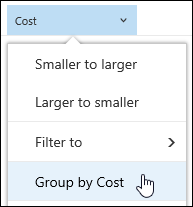
- On the document library page, point to the name of the column that you want to group by and click the down arrow next to the column name.
- Click Group by to group the items in the document library by the column selected.
Name and save a custom view of a document library
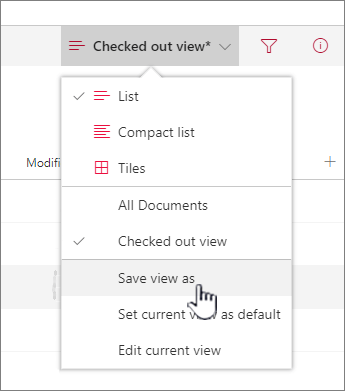
- Once you've created a custom view, an * will appear next to name of the view at the top right of the document library page to indicate that the view has been modified. To save your changes, click View options and then click Save view as.
Modify a custom view of a document library
To modify a custom view of a document library:
- Navigate to the custom view that you want to modify.
- To add a new column type, click the add column button + Add column or +. From here you can add a common column type, or click More. to create custom types. If the column already exists, click Show/hide columns. For more info, see Create a column in a SharePoint list or library.

Make the edits to the custom view that you want and then click View options
Set the default view for a document library
To set the default view for a document library, navigate to the view you want to set as the default and then click Set current view as the default in the view menu.
Delete a custom view of a document library
To delete a custom view of a document library, you must have library owner or admin permissions for the library where you want to delete the custom view. See Delete a custom view of a document library for the steps to delete a custom view of a document library.
